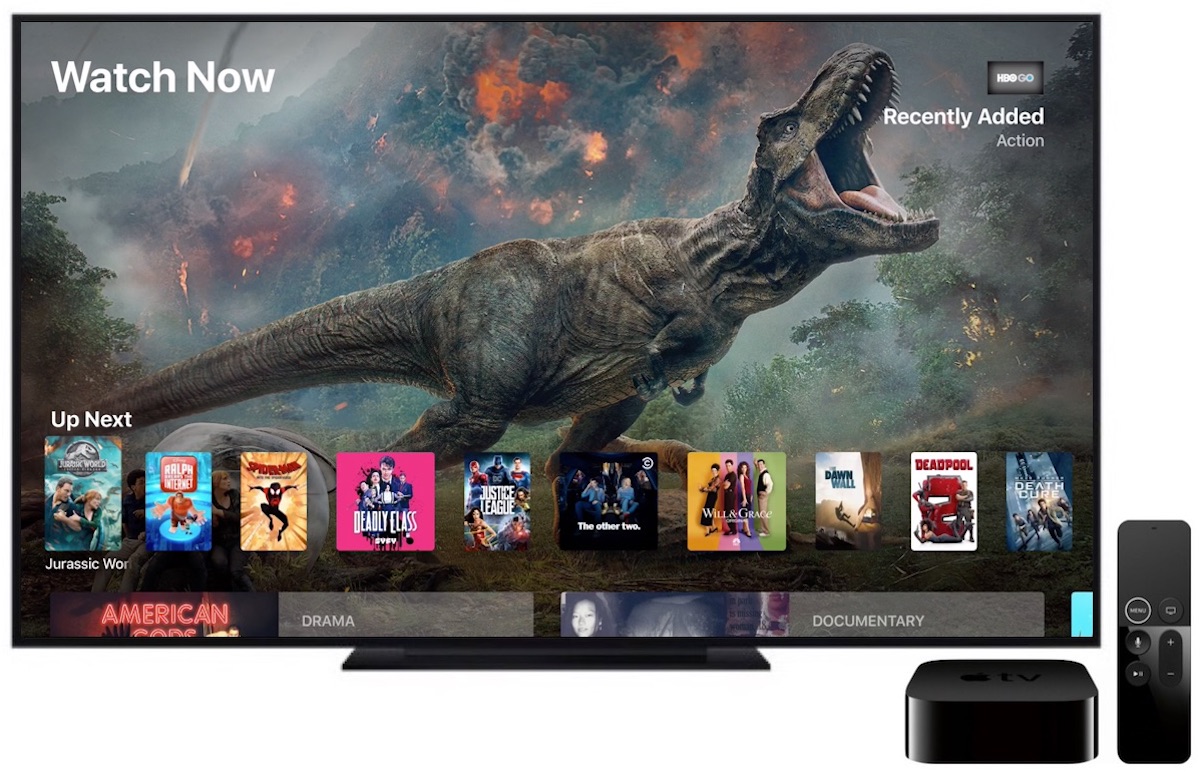
Smart devices can behave strangely at any time, and Apple TV is not exempted from this. Many things could go wrong with your Apple TV such as not playing sound, or playing video or stuck on Apple logoscreen. Of course, if your Apple TV is stuck on Apple Logo, it is a frustrating thing to experience, and you should find something to do about it.
Should your Apple TV ever get stuck on Apple logo or does not play anything, there are some things you can do to fix the problem. It could be a hardware problem or software problem, and the solutions we have highlighted here can solve the problem of Apple TV stuck on Apple Logo. Let’s get right to it.

Tip 1. Check the Power Supply
Tip 2. Change Display Mode
Tip 3. Restore Apple TV to Factory Settings
Tip 4. Restore Apple TV Using iTunes
Tip 5. Fix ‘Apple TV Stuck on Apple Logo’ Without Data Loss
Tip 6. Contact Apple Support
Tip 1. Check the Power Supply
Constant Power Supply
If your Apple TV is stuck on Apple logo, first check if the TV is getting enough power supply to power on. Check the status light if it is on. If the status light is not on, press the remote to make it flash by waking up your Apple TV.
If nothing happens, you can disconnect the power cord from your TV and wait for a few seconds and then reconnect the power cord to the power outlet. If your Apple TV is still stuck on Apple Logo after this, follow the next step.

Tip 2. Change Display Mode
Changing the video resolution can also fix the problem of Apple TV stuck on Apple Logo or black screen. Use the remote to change the display mode by changing video resolution.

Tip 3. Restore Apple TV to Factory Settings
Restoring your Apple TV to factory settings can be done through the steps below.
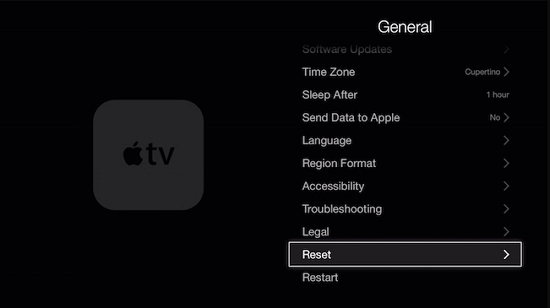
For Apple TV 4K or 4th Generation
Go to Settings. Select “System” and Choose “Reset.”
Choose the option for reset between “Reset” and “Reset and Update.”
Reset only returns your Apple Tv to factory settings and does not require an internet connection while “Reset and Update” will return your Apple TV to factory settings and at the same time install software updates.
Make sure that your Apple TV is plugged throughout the Reset process.
For 3rd Generation Apple TV
Navigate to “Settings”. Select “General” and then, “Reset.”
Choose your Reset option between “Reset all Settings” and “Restore.”
“Reset All Settings” resets all of your account configurations and accounts while “Restore” option restores the Apple TV to factory settings and updates the tvOS.
Ensure that your Apple TV remains plugged to power until the process is complete.
After you have finished resetting or restoring your Apple TV, you can then set it up all over again.
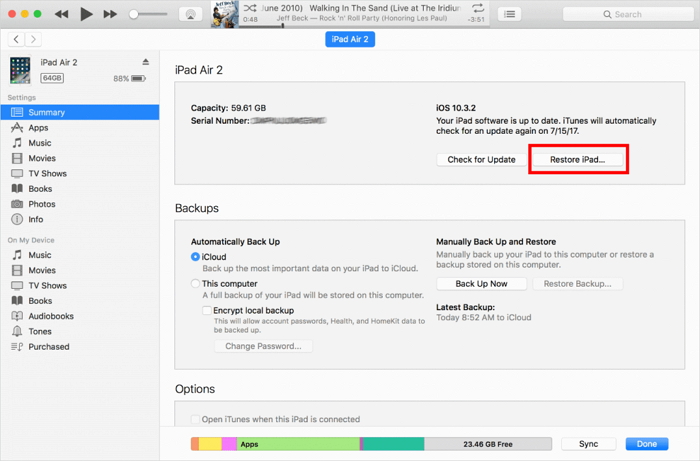
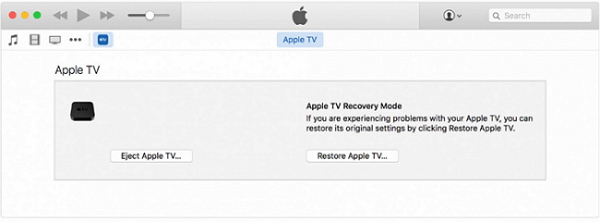
Tip 4. Restore Apple TV Using iTunes
To fix the problem of Apple TV stuck on Apple Logo, you can try synchronizing the Apple TV with a Windows PC or MacBook and do a force-restore using iTunes. Follow the steps below.
Connect your Apple TV using a USB cable to your Windows PC or MacBook.
Launch iTunes.
Click on the “Devices” menu and select Apple TV.
Click on “Next” and then, “Restore.”
Tip 5. Fix ‘Apple TV Stuck on Apple Logo’ Without Data Loss
If you have attempted all of the methods above and your Apple TV stuck on Apple logo still seems not to be fixed then, it is time for you to try a third-party software that fixes tvOS issues without losing data. This tool supports all tvOS versions including the newest Apple TV models.Also Read:Top 9 Best Alternative Websites to AudioBook Bay in 2019
Also Read:4 Best iOS Cleaner Apps to Clear Junk on iPhone/iPad in 2019
Also Read:How to Make Your Phone Number Private on Android or iPhone
Also Read:How to Fix Your iPhone Microphone Not Working (iOS 12 Supported)