Thursday, September 27, 2018

How to Fix iPhone X/XS Face ID Disabled 2019

How to Fix iPhone X/XS Face ID Disabled


Try Hard Restart on iPhone

If your iPhone X’s Face ID is malfunctioning because of a software glitch or a bug in your iOS version, you can try to force restart it. Various reports claim that this method worked to fix Face ID on their iPhone X.

Sponsor ads:Fix “Please insert a disk into removable disk” without Losing Data


How to Duplicate Snapchat on iPhone in 2019 (iOS 12 Supported)


Press and hold the Volume Up button and quickly release it.


Press and hold the Volume Down button and quickly release it.


Press and hold the Side button until the Apple logo appears.


Try Reset All Settings

Many iPhone X users who got the notification “Face ID has been disabled” reported that they were able to solve this issue by resetting all the settings on the iPhone X. You can have a try:


Go your iPhone X/XS "Settings" app and launch it.


Look for "General" and click on it.


Then, click on “Reset”.


Click on “Reset All Settings” and enter your passcode to begin.


Reset all settings on your iPhone won’t affect any data in your iPhone.
What to Do If Face ID is Not Working on Your iPhone X/XS

If you need help to reset Face ID when it’s not working on iPhone X/XS, then you should try the following troubleshooting techniques:


Check for Updates: Try to update your iPhone X to the latest iOS version. You can do this by going to “Settings > General > Software Update”.


Check Your Face ID Settings: You may have turned off Face ID feature on your iPhone X. So, go to “Settings > Face ID & Passcode”. Then, make sure Face ID is turned on.


Clear Any Dirt or Residue on TrueDepth Camera: If dirt or residue is covering the TrueDepth camera, remove it. Also, check to see if your screen protector or phone case is covering the TrueDepth camera.


Make Sure Your Face is Not Covered: If you’re wearing a cap or sunglasses that covers your nose, eyes, or mouth making them become less visible to the TreuDepth camera, Face ID won’t work. So, try using Face ID without your cap or sunglasses.


Face the TrueDepth Camera: If you’re not facing the TrueDepth camera, then your Face ID will not work. The Face ID works only when your iPhone is in portrait orientation while you’re facing the TrueDepth camera. Also, make sure that your iPhone X is arm’s length away from your face.Gihosoft Photo Eraser Erase unwanted objects and perfect your amazing photos!


If you lost data after you updated to a new iPhone, you can always use Gihosoft iPhone Data Recovery to get the data back from the old iPhone or backup.


Jihosoft Photo Eraser


Free iTunes/iPhone Backup Extractor for iPhone, iPad


iPhone Backup Extractor - Extract Data from iPhone Backup


Jihosoft Android Data Recovery: the best Android Data Recovery software for Windows and Mac to recover deleted contacts, messages, photos, videos, WhatsApp and etc from Android devices.

Tuesday, September 18, 2018

How to Make a Backup for iPhone before Updating to iOS 12


Now that the iOS 12 (public beta) is available with latest features and smooth functionality, there is no point of stagnating yourself into old iOS versions. As you may know, Apple releases timely updates to their operating systems and iOS 12 is their latest version (which is available as a public beta version as of this writing). After an iOS update, you will be able to enjoy a seamless functionality and better security on your iDevice.

However, as a smart iOS device user, you should backup iPhone before update takes place.

Although it sounds like a no brainer, a surprising number of iDevice users don’t backup iPhone before update. The consequences of disregarding the importance of backup can be pretty devastating.

The purpose of this article is to explain the importance of creating a backup before upgrading to iOS 12 and the free ways to do it.
Part 1: Do I Need to Backup iPhone before Updating to iOS 12?

Many novice iPhone users often asked “why do I need to backup my iPhone before updating to iOS 12?”. Here’s why you should do it.


Due to a failed iOS upgrade your files can be gone for ever.


You may accidentally delete some files before an iOS update.


iOS 12 is still available as a public beta and there may be a slightest chance for it to make your device unstable (it is a very rare instance though).


Our general advice is that it is better be safe than sorry.
Part 2: 3 Free Ways to Make a Backup for iPhone before Updating to iOS 12

As we mentioned before at the beginning, we are going to explain 3 free ways to backup iPhone before update. From this point onwards, we explain those free methods for you to try.


Way 1: Backup iPhone Xs/Xs Max/Xr/X/8/7/6/5 Free before Updating to iOS 12 with iTunes


Way 2: Backup iPhone Xs/Xs Max/Xr/X/8/7/6/5 Free before Updating to iOS 12 with iCloud


Way 3: Backup iPhone Xs/Xs Max/Xr/X/8/7/6/5 Free before Updating to iOS 12 with Backup Tool
Way 1: Backup iPhone Xs/Xs Max/Xr/X/8/7/6/5 Free before Updating to iOS 12 with iTunes

As the first free method, we explain how to backup iPhone using iTunes (which is a tool offered by Apple itself).


Launch iTunes and get the device connected to the same computer.


If prompted, you should provide the device’s passcode. If the process asks you to Trust This Computer, just follow the steps displayed on screen.


When iTunes asks, you should select the iOS device (iPhone, iPod or iPad) you are using.


Now, click on the option called Backup Now in order to create the backup.


At the end of the process, you will be notified with a message on Summery Screen.


Advantages and Disadvantages of iTunes backup


Advantages of iTunes


It is a free service offered by Apple itself


Comes as a trusted service offered by Apple


It doesn’t require an internet connection to create backups


Disadvantages of iTunes


It takes a lot of disk space


You cannot restore selective backups with iTunes


When restoring, iTunes overwrites the existing backups

Way 2: Backup iPhone Xs/Xs Max/Xr/X/8/7/6/5 Free before Updating to iOS 12 with iCloud

iCloud is another tool (service) offered by Apple itself in order to address a large range of issues. Since it is a built-in feature, many individuals tend to use iCloud with more confidence. Moreover, this respective method is compatible with all the iOS devices you use.

Now, let’s take a look at how to backup iPhone before update using iCloud.


As the first step, you should connect your device to a Wi-Fi network (many users consider it as a disadvantage though).


Now, tap on Settings, your name and select iCloud option. However, if you use an older version (10.2 or earlier) you should Select the Settings option and scroll down to find the iCloud option.


Now, select the option called iCloud Backup. If it is an older version, simply select Backup. Be sure that iCloud backup is enabled.Jihosoft Photo Eraser


Now, you should select the option called Back Up Now. Be sure that your device is connected to the Wi-Fi network until you get the backup done. The progress of the process can be monitored and Confirm at the completion of the backup. To check it, you should tap on the Settings, your name and iCloud. Under iCloud Backup, you will be able to see the option called Back Up Now. Check the date and time of the last backup.


Note: Create an automatic backup using iCloud

You can even consider creating an automatic backup with iCloud. This option will create a daily backup automatically. Here’s how to do it: Go to Settings -> select your name -> iCloud and then select iCloud Backup. Then, turn the iCloud backup on.
Advantages and Disadvantages of iCloud backup


Advantages of iCloud


It is a trusted service offered by Apple itself


It can back up any data


Easy to use method


Disadvantages of iCloud


The free storage is limited for 5 GB (thereafter, you should subscribe this service)


It cannot create selective backups


The backup solely depends on Wi-Fi connection

Gihosoft Photo Eraser Erase unwanted objects and perfect your amazing photos!
If you lost data after you updated to a new iPhone, you can always use Gihosoft iPhone Data Recovery to get the data back from the old iPhone or backup.


Monday, September 17, 2018

How to Prepare iPhone for Sale - Back up Your Data


How to Prepare iPhone for Sale - Back up Your Data


Before you erase your phone to its factory settings you will want to make sure that all of your important data is saved and backed up so that you can retrieve it on your new phone. To do this, you can back up all of your data to iTunes or iCloud. With the help of a backup, you can save your contacts, text messages, photos, videos, ringtones, or anything else you would like to transfer to your new phone. Here's how:
1 Using iTunes


Step 1: Connect your iPhone to your computer and open iTunes.


Step 2: On the left side drop-down menu you will see a Device icon, click on it to select your Device.


Step 3: Select "Summary".


Step 4: Under "Manually backup and restore", click on "Back up now".


Step 5: Wait for backup to complete.


2Using iCloud


Step 1: On your iPhone, go into your "Settings" option.


Step 2: Tap on your Apple ID.


Step 3: Tap iCloud --> iCloud backup --> Backup Now.


Step 4: Wait for backup to complete.
How to Prepare iPhone for Sale - Sign out of iCloud


When selling your phone, signing out of iCloud is important in keeping your data safe and secure. When you sign out of iCloud, you will also be signed out of a variety of other apps including Apple Pay, Find My Friends, Find My iPhone, and photo sharing among many more. This will help to ensure that no one can gain access to your accounts and passwords after you sold your phone. Here's how:


Step 1: On your iPhone go into Settings and click on your name/device.


Step 2: Scroll down to "Sign out" and click on it.


Step 3: When prompted, enter your Apple ID and tap "Turn off".


Step 4: Confirm your decision to sign out of iCloud.


How to Prepare iPhone for Sale - Erase iPhone to Factory Settings


When selling your iPhone, no one will want to receive it if it is full of all your old data. Not only that, but handing over your iPhone without completely erasing everything could put your private data and information at risk. As such, you will want to restore your phone to factory settings before selling. This will erase all data on the phone and restore it to its original settings. Here's how:


Step 1: On your iPhone, go into Settings --> General --> Reset.


Step 2: Click on "Erase All Content and Settings".


Step 3: Enter code and password if prompted.


Step 4: Enter Apple ID.


Step 5: Wait for the process to complete.


Note: This process will erase all data and information on your phone. However, the data erased using this method is still recoverable. If you need to erase them completely without any chance of recovery, you may need an Erase Tool to do this for you. Gihosoft Photo Eraser Erase unwanted objects and perfect your amazing photos!


If you lost data after you updated to a new iPhone, you can always use Gihosoft iPhone Data Recovery to get the data back from the old iPhone or backup.


Jihosoft Photo Eraser


Free iTunes/iPhone Backup Extractor for iPhone, iPad


iPhone Backup Extractor - Extract Data from iPhone Backup


Jihosoft Android Data Recovery: the best Android Data Recovery software for Windows and Mac to recover deleted contacts, messages, photos, videos, WhatsApp and etc from Android devices.

Tuesday, September 11, 2018

How to Repair Corrupted SD Card or USB Drive


How to Repair Corrupted SD Card or USB Drive


To assign a drive letter, follow these steps:


Connect the storage media to the PC.


Right click This PC/My Computer, and select “Manage” from the drop-down window.
Sponsor ads:Best iOS Emulator For Windows To Build & Run iOS Apps

Select “Disk Management” on the left and wait some seconds for the “Virtual disk service” to load.


Now right-click on the storage device and select “Change Drive Letter and Paths”.
Sponsor ads:10 Best Game Download Sites for PC & Android

Click the letter and select “change”. It should become blue.

Sponsor ads:Use Remote Desktop Connection in Windows 10
Choose a drive letter from the drop-down menu and select “Ok”.


After that you can go to My Computer and check whether the USB drive can be accessed.
Try Using It On Another Computer

Perhaps the problem is specific to your computer, and that’s why you’re having problems using the USB flash storage device. Try another PC by connecting your USB drive or SD card to it. Hopefully, it should function, and allow you to create a backup of important files from it.
Change the USB port or Use an SD Card to USB Adapter

Although, it seems strange, but you could be wasting your precious hours by repeatedly attempting to connect your flash drive or SD card to the same USB port in your PC. It could be that the port is damaged or there’s a software bug that’s preventing it from working properly. Hence, try using another USB port and see if it works.
Initiate Driver Reinstallation

There are instances where the drivers that power your USB corrupt and prevent your PC from detecting storage media. A fix might be available in the form of driver reinstallation. Take these steps to reinstall drivers:

Sponsor ads:Download Game of Thrones Season 7 Episode 4 Subtitles?

Must Read:If you lost data after you updated to a new iPhone, you can always use Gihosoft iPhone Data Recovery to get the data back from the old iPhone or backup.

Gihosoft Free iPhone Data Recovery:iphonerecovery.com
If you use android phones, please choose Gihosoft Android Data Recovery
Sponsor ads:10 Best Two Player Games for iPhone and iPad to play Challenges with Your Friends

Right click “This PC/My Computer” and choose “Manage”.


On the left side, click “Device Manager”. Then on the list that appears, Double-click “Disk Drives” and right-click on your USB drive’s name.


Now, click “Uninstall” and choose “Ok”.


After that, disconnect the storage medium and restart the computer.


Connect the storage medium again. It should be detected.
Using Windows Explorer to Repair Corrupted USB Drive or SD Card

If your USB drive or SD card doesn’t work after you’ve taken the above mention measures, try using Windows Explorer. It’s the most recommended procedure for repairing corrupted storage. Follow these steps.


Launch “This PC/My Computer”, choose the corrupted storage and right click. Choose “Format” from the drop-down menu and select “Restore Device Defaults” in the popup that appears.


Next, choose “Start” to start the formatting. Before the process takes place, you get the option to uncheck the “Quick format” option if you want the PC to initiate a deep scan of the card/drive. However, this can take some time, so uncheck if you fail with the quick format.


In the dialog box that gives a warning that your data will be wiped, click “Ok”. Wait a few moments for the formatting process to complete. Now you’ll have an error free USB drive or SD card.
Using CMD to Repair a Corrupted SD card or USB Drive

This step includes the use of Windows command prompt (aka CMD). Here, you’ll be entering a few CMD commands, forcing Windows to format the SD card/pen drive.


Below are the steps.


Connect the corrupted SD card or USB drive to the PC. Hover the mouse at the top of the “Start” button and perform a right-click. Select “Command Prompt (Admin)” to launch a CMD window.


Type “diskpart”, press Enter, and then type “list disk” and press Enter again. Now you’ll see a list of all storage devices connected to your PC.


Type “select disk <the disk number>” and press “Enter”. Make sure it’s the correct number. Entering a wrong one puts your internal hard drive at risk. Type “list disk” again to verify the disk number. You’ll see an asterisk symbol before the selected disk’s name.


Type “clean” and hit Enter. Now type “create partition primary” and press Enter again. Type “active”, type “select partition 1” and type “format fs=fat32” and hit Enter. The formatting process will end in a few seconds. If you’re carrying files bigger than 4 GB, you can write NTFS, not fat32. Until the work completes, don’t close the CMD window.
Removing Bad Sectors to Repair SD card/USB drive

Storage gadgets can store data in a variety of sectors. Because of several reasons, these sectors can go unusable, which can result in bad sectors. By running straightforward commands and using simple steps, a USB drive repair can be performed to fix the problem.
Recovering Lost Data from SD Card or USB Flash Drive

EaseUS Data Recovery Wizard is highly recommended to recover data from an SD card or USB flash drive. It works when you made a mistake of deleting or formatting files on your storage device. The USB drive or SD card needs to be working for the recovery to take place. Piriform’s Recura is another notable data recovery software.
Conclusion

It’s worth mentioning that the USB and SD card repair methods mentioned in this post are general tactics to fix the issue. They might not turn out to be useful in some instances. That said, there’s no harm in giving them a try.

You may also like:Gihosoft Mobile Transfer: 1 Click Data Transfer from Phone to Phone

Gihosoft Android data recovery Free is a super awesome software specialized in Android file recovery. With this program, you are able to recover deleted photos, music, videos, messages, contacts, call logs, WhatsApp messages, Viber chat history and more from Samsung, Huawei, LG, HTC, Motorola, Google, Oneplus, Sony, Lenovo, ZTE and other Android devices directly. Meanwhile, this Android data recovery software is available for both Windows and Mac platforms.

For now, check:Free iTunes/iPhone Backup Extractor for iPhone, iPad

Jihosoft iTunes Backup Extractor free is a powerful tool to recover and extract important data from iPhone, iPad & iPod touch backup on Windows or Mac.

If you can’t sync with iTunes and want to rescue data from a disable iPhone, you could try Gihosoft iPhone Data Recovery. Also feel free to ask questions on the iDevice is disabled error in the comments section below.

Top 5 Fun iOS Apps to Change Hair Color in Photos


Top 5 Fun iOS Apps to Change Hair Color in Photos

People like to change their hairstyles often. It gives them a fresh look and instant attention at the parties and weddings. Everyone wants to look attractive and be Instagram-ready at all times. Don’t we all?


While changing hairstyles is easier, changing hair color is not. What if it doesn’t suit you? It can, at times, go horribly wrong. How about an app shows how you are going to look in that funky new color?

There are plenty of apps on the App Store that will help you try new colors before applying one at your favorite beauty salon. For best results, I would suggest you to use one of these apps using your photos in front of your hair stylist. After all, he/she is the expert and will be able to guide you best.

Let’s begin.


4 Best iOS Apps to Download Music Tracks with iPhone

READ MORE
1. HAIR COLOR

Hair Color (generic app name) is a cool little app that does one thing and does it well. It comes with a live selfie camera option that you can use to try different hair colors in real time. Just launch the app, face the camera and select from a range of colors (50+ shades) to try on.


You can also increase or decrease the intensity and depth of the color using the vertical bars. It's surprising that there is no way to save pictures. But if that is what you want to do, take a screenshot. You can then share it with your friends and hair stylist to collect opinions.

The app contains no ad, has a palette of colors for free and offers in-app purchases for the paid ones marked with a star.
2. HAIR COLOR CHANGER

Want to try multiple colors at once or use different shades? A stroke of brilliance, maybe? Hair Color Changer offers more control over the part of your hair you can color. The app uses gestures to dye hair, move images around, and zoom in/out.

Unlike Hair Color, you can either click a new pic or use an existing one from the gallery. Select the pencil icon and increase or decrease the size of the tip using the upper horizontal slider. The lower one will adjust darkness.


You can then begin painting hair using your fingers to see which color will do justice to your look. You can also save your work in the Photos app.

The app is free to use but contains ads, and comes with in-app purchases for unlocking additional colors and shades.
3. HAIR COLOR BOOTH

Hair Color Booth comes with similar options and user interface but with a wider palette for colors and shades. The app offers no live view so you will have to work with selfies. You need to use fingers and gestures to apply colors in strokes.


Similar to Hair Color Changer app, you can adjust the strength and saturation of the strokes. Not only that, you can also control the smoothness. Play around with these three options to see which one works for you.Sponsor ads:Best Torrent Search Engine Sites to Find Your Favorite Torrents

The app contains no ads but offers in-app purchases to access additional colors.
ALSO CHECK:
How to Stop iPhone from Taking Photos in HEIC in iOS 12

READ MORE
4. HAIR STYLE SALON

It is difficult to take decisions, especially when it concerns your look. This is what friends are for. While they can always share their opinions, isn't it better to ask the folks who color their hair often? This is why Hair Style Salon comes with a voting system.

Choose a hairstyle, apply the color you like, and put it out for voting. I recommend creating a profile to get the most out of Hair Style Salon app.


There are different tabs to choose hair styles, color, and vote. You will find categories like long, short, and curly. Once you select relevant options, you can add color to your hair in the photo.

Instead of preset colors and shades, you can choose any color and mix and match with different shades using the color picker (they call it IRIS). The color tool is free to use but if you want to try new hairstyles, it will cost you $2.99 a week.

It is one of the best iOS apps to change hair color and experiment with your looks.
5. HAIRSTYLE MAKEOVER

Hairstyle Makeover is the last app in the list that lets you go a step ahead to check your look digitally. The only thing that annoyed me the most was the fact that I couldn’t change my hair color without choosing a hairstyle first. If you are fine with that, it’s a cool little app.


There are many different hairstyles for you to choose from. You can experiment with your own photo or choose one of the models. Once you have selected the hairstyle and adjusted the size, you will see more options.

Here you can either change the hue or tint of the hair color. While the effects are interesting and unlike what I saw in the previous apps, I wish there were more ways to play with the color.

Other options include ability to blur, flip, cut, and crop. Certainly worth a look.
LOVE IS IN THE H-AIR

Hair is one of the first things that people notice about you. I mean, it is right at the top of your head! A great hairstyle and color can make a lot of difference in your physical presentation.

These iOS apps will help you change hair color in your photos (or let you see a live preview), so you can experiment, collect feedback, and decide on your next hot new look.

If you lost any edited or un-edited selfie photos on iPhone, you can recover them by using the handy tool Gihosoft iPhone Data Recovery.


Free iTunes/iPhone Backup Extractor for iPhone, iPad

Jihosoft iTunes Backup Extractor is a powerful tool to recover and extract important data from iPhone, iPad & iPod touch backup on Windows or Mac.

Monday, September 10, 2018

The best way to Fix Error 2 (Windows Error 2)


Solutions to Fix Error 2 (Windows Error 2)

The following troubleshooting solutions may help to fix iTunes error 2.
Tip 1.Ensure that You’re Logged into Your Computer as An Administrator

The administrator of a Windows PC is someone who can make changes on the computer that will affect other users of the computer. If you’re not logged on to your Windows PC as an administrator, then follow these steps to check if you’re using an administrator account:

Step 1. Type the username and password for your account in the welcome screen.

Step 2. Click the “Start > Control Panel > User Accounts > Manage User Accounts” buttons.


Step 3. If you’re prompted to provide an administrator password, type the password and provide confirmation. Your username will be highlighted and your name is shown in the group icon as the administrator. However, if your account is not the administrator, then you can’t log in as the administrator.
Tip 2.Check and Update Your Windows

iTunes works with the latest Microsoft Windows versions. However, if you don’t know whether your Windows is outdated, check and update it by following these steps:

Step 1. Click the Start menu, and navigate to “Settings > Update & Security Settings > Windows Update > Check for Windows Update”.


Step 2. If updates are available, windows will automatically start to download the update.

However, if Windows says that PC is up to date, it means that your PC is lacking no current update, and you need to find another way to solve error 2.
Tip 3.Download the Supported Version of iTunes from Apple Website

If you downloaded iTunes from a malicious website, then you have to re-download it now from Apple’s official website, or Microsoft Store.

You may also like:Gihosoft Mobile Transfer: 1 Click Data Transfer from Phone to Phone

Gihosoft Android data recovery Free is a super awesome software specialized in Android file recovery. With this program, you are able to recover deleted photos, music, videos, messages, contacts, call logs, WhatsApp messages, Viber chat history and more from Samsung, Huawei, LG, HTC, Motorola, Google, Oneplus, Sony, Lenovo, ZTE and other Android devices directly. Meanwhile, this Android data recovery software is available for both Windows and Mac platforms.

For now, check:Free iTunes/iPhone Backup Extractor for iPhone, iPad

Jihosoft iTunes Backup Extractor free is a powerful tool to recover and extract important data from iPhone, iPad & iPod touch backup on Windows or Mac.

If you can’t sync with iTunes and want to rescue data from a disable iPhone, you could try Gihosoft iPhone Data Recovery. Also feel free to ask questions on the iDevice is disabled error in the comments section below.

How to Turn Voice Memo into Ringtone using iTunes


How to Turn Voice Memo into Ringtone using iTunes

You can use the Voice Memos app on your iPhone to record any audio that you wish to set as your ringtone. Follow these steps to record a ringtone for iPhone:


Open the voice memo app on your iPhone and pick the voice memo you want to use.


Tap it and pick the “mail” option to share the voice memo via email.


Open your email on your PC and download the voice memo.


Change the file extension of the voice memo from .m4a to .m4r.


Once you’ve changed the extension, launch iTunes on your PC.


Next thing - connect your iPhone to your PC.


Once you’ve changed the extension, launch iTunes on your PC.


Pick and drop the ringtones from your PC to the iTunes Tones library.You may also like:jihosoft iphone data recovery


Must Read:Jihosoft iTunes Backup Unlocker


You may also like:online youtube downloader


That’s it, the voice memo will get synced with your iPhone.

So, we’ve taught you how to turn voice memo into ringtone using two different methods –TunesMate and iTunes. Now, it is completely up to you to pick the method that suits you best. However, based on user reviews, we’ll recommend TunesMate as it is easier and allows you to customize the voice memo before you convert it to a ringtone.

Thursday, September 6, 2018

pwn.js WebKit exploit affects iOS 10-11.3.1 versions


pwn.js WebKit exploit affects iOS 10-11.3.1 versions

IOS 10-11.3.1 USERS ARE VULNERABLE TO SAFARI EXPLOIT

Two months ago, Phoenhex Dev Team released the pwn.js exploit for mobile Safari web browser. As expected, Apple promptly patched this vulnerability in iOS 11.4 firmware.

Jailbreak developers pounced on the opportunity and quickly developed a browser-based jailbreak for iOS 10-10.3.3. However, in doing so, the team left all jailbreak-able versions vulnerable to web attacks.

According to Jake James, all devices running iOS 10-11.3.1 are vulnerable, even though the jailbreak works only support iOS 10.

James also developed a proof-of-concept that transforms totally-not-spyware into a real spyware using eggshell.

Make no mistake – Spyware JailbreakMe itself is secure but creators of other websites may have sinister intentions.

An attacker could slap up a pwn.js-based malicious website, spread the link, and gain remote access to users’ devices on the affected firmware.
WHEN WILL A SECURITY PATCH BE RELEASED?

Back in 2016, security researcher Luca Todesco developed JailbreakMe 4.0 for iOS 9 firmware and immediately released a patch for his exploit.

At the time of this writing, Ben Sparkes and his team are working on a similar security patch for affected versions. This upcoming patch will likely be distributed in the form of a tweak via Cydia.


As of right now, there’s no fix except for upgrading your device to iOS 11.4 (final) or above versions.You may also like:jihosoft iphone data recovery

Alternatively, you can disable Javascript from Safari’s settings. Doing so will render this WebKit vulnerability useless. However, it’s not a feasible solution by any means; the reason being that every website uses Javascript technology in some capacity.

With that being said, Phoenhex Dev Team member Niklas Baumstark has close-sourced the stage 2 of pwn.js exploit to protect users from malware. Nevertheless, a full-blown security patch would still prove useful.

Gihosoft Android data recovery Free is a super awesome software specialized in Android file recovery. With this program, you are able to recover deleted photos, music, videos, messages, contacts, call logs, WhatsApp messages, Viber chat history and more from Samsung, Huawei, LG, HTC, Motorola, Google, Oneplus, Sony, Lenovo, ZTE and other Android devices directly. Meanwhile, this Android data recovery software is available for both Windows and Mac platforms.

Wednesday, September 5, 2018

How to Transfer WhatsApp from iPhone to Android


How to Transfer WhatsApp from iPhone to Android

WhatsApp is a great and most popular app which is used by millions of users all around the world. The user can send and receive messages, videos, images and can do much more while connecting with friends and family members. So, you have your important chat history and data on WhatsApp and want to change your mobile phone? You just need to learn the ways to transfer WhatsApp text and photos from iPhone to Android phone. It is quite easy and demands to follow simple steps.


Transfer WhatsApp Texts and Photos from iPhone to Android

Have a look at the following different methods with their complete step by step details.
#1. Use Backuptrans to Transfer WhatsApp Texts and Photos from iPhone to Android

This is the first way which can help you to save your WhatsApp data and get it on any new phone. You can transfer your data from iPhone to Android or from Android to iPhone using this helpful method. This is a powerful technique which allows you to copy every kind of data and then you can transfer it to your new Android phone without the possibility of data loss. The steps are easy to understand and follow.You may also like:Gihosoft Mobile Transfer: 1 Click Data Transfer from Phone to Phone

Gihosoft Android data recovery Free is a super awesome software specialized in Android file recovery. With this program, you are able to recover deleted photos, music, videos, messages, contacts, call logs, WhatsApp messages, Viber chat history and more from Samsung, Huawei, LG, HTC, Motorola, Google, Oneplus, Sony, Lenovo, ZTE and other Android devices directly. Meanwhile, this Android data recovery software is available for both Windows and Mac platforms.

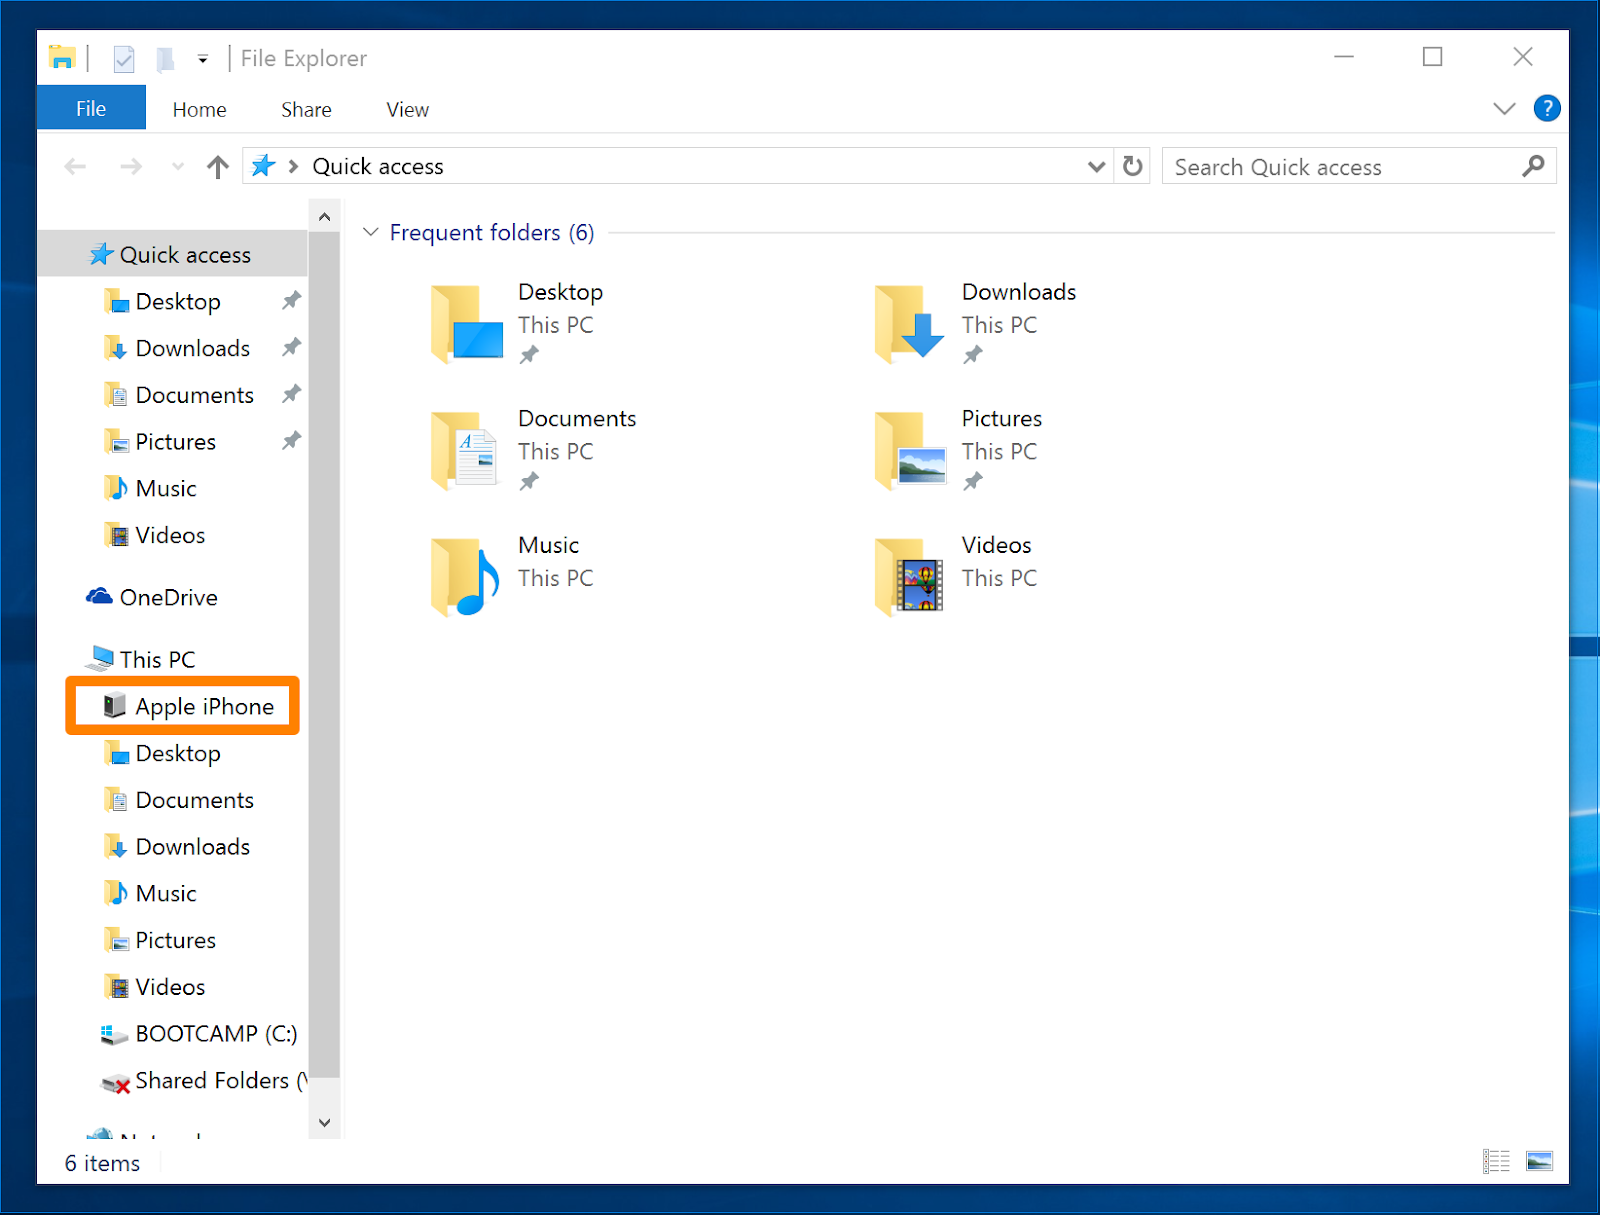
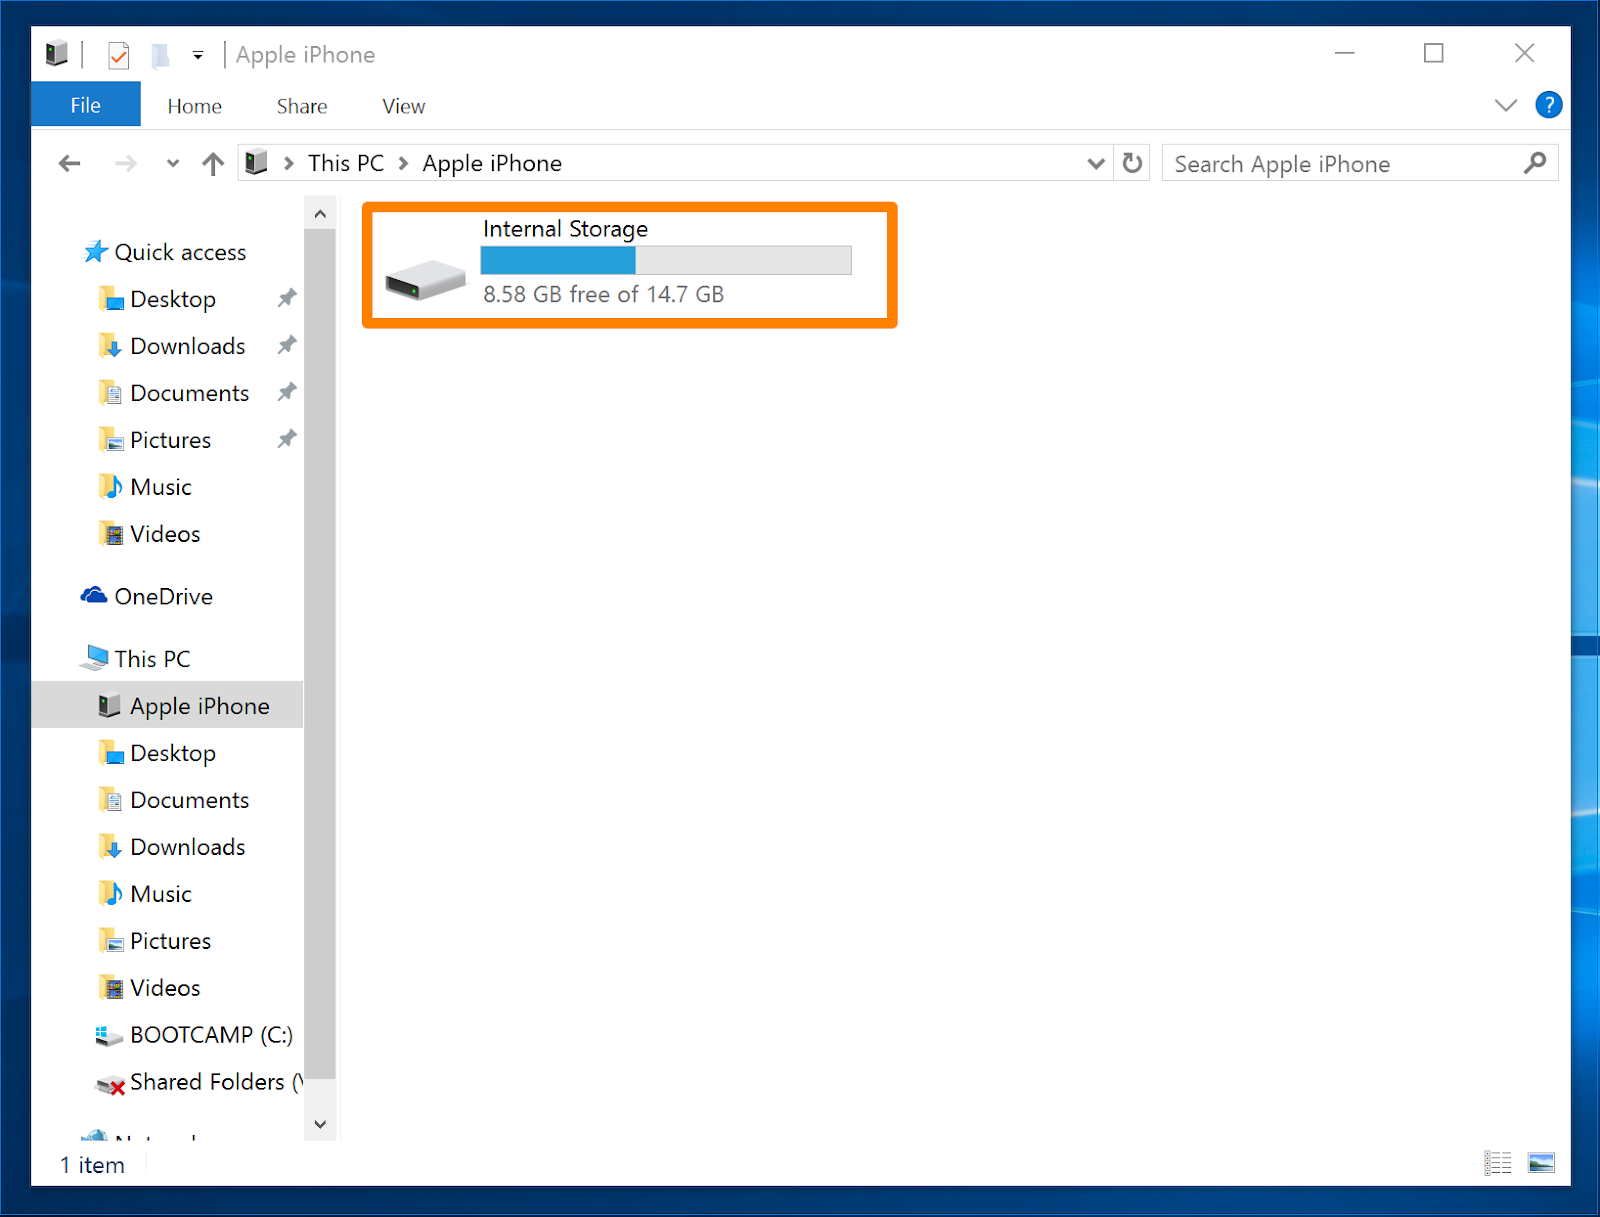
Step 1: Connect your iPhone and Android to the computer via USB cables

To initiate the process, first of all, you need to install Backuptrans on your Mac or PC. For this, you may need to confirm that iTunes is updated on your computer and you have enabled the USB debugging setting on your Android which can help you.


You need to plug your iPhone and Android devices with the computer system using USB. You can tap on “Back up my data” if you want to manage WhatsApp contents on Android. After this, you have to come to the computer and click “OK” for further process. As a result, the software will enable you to access the WhatsApp data on the device.

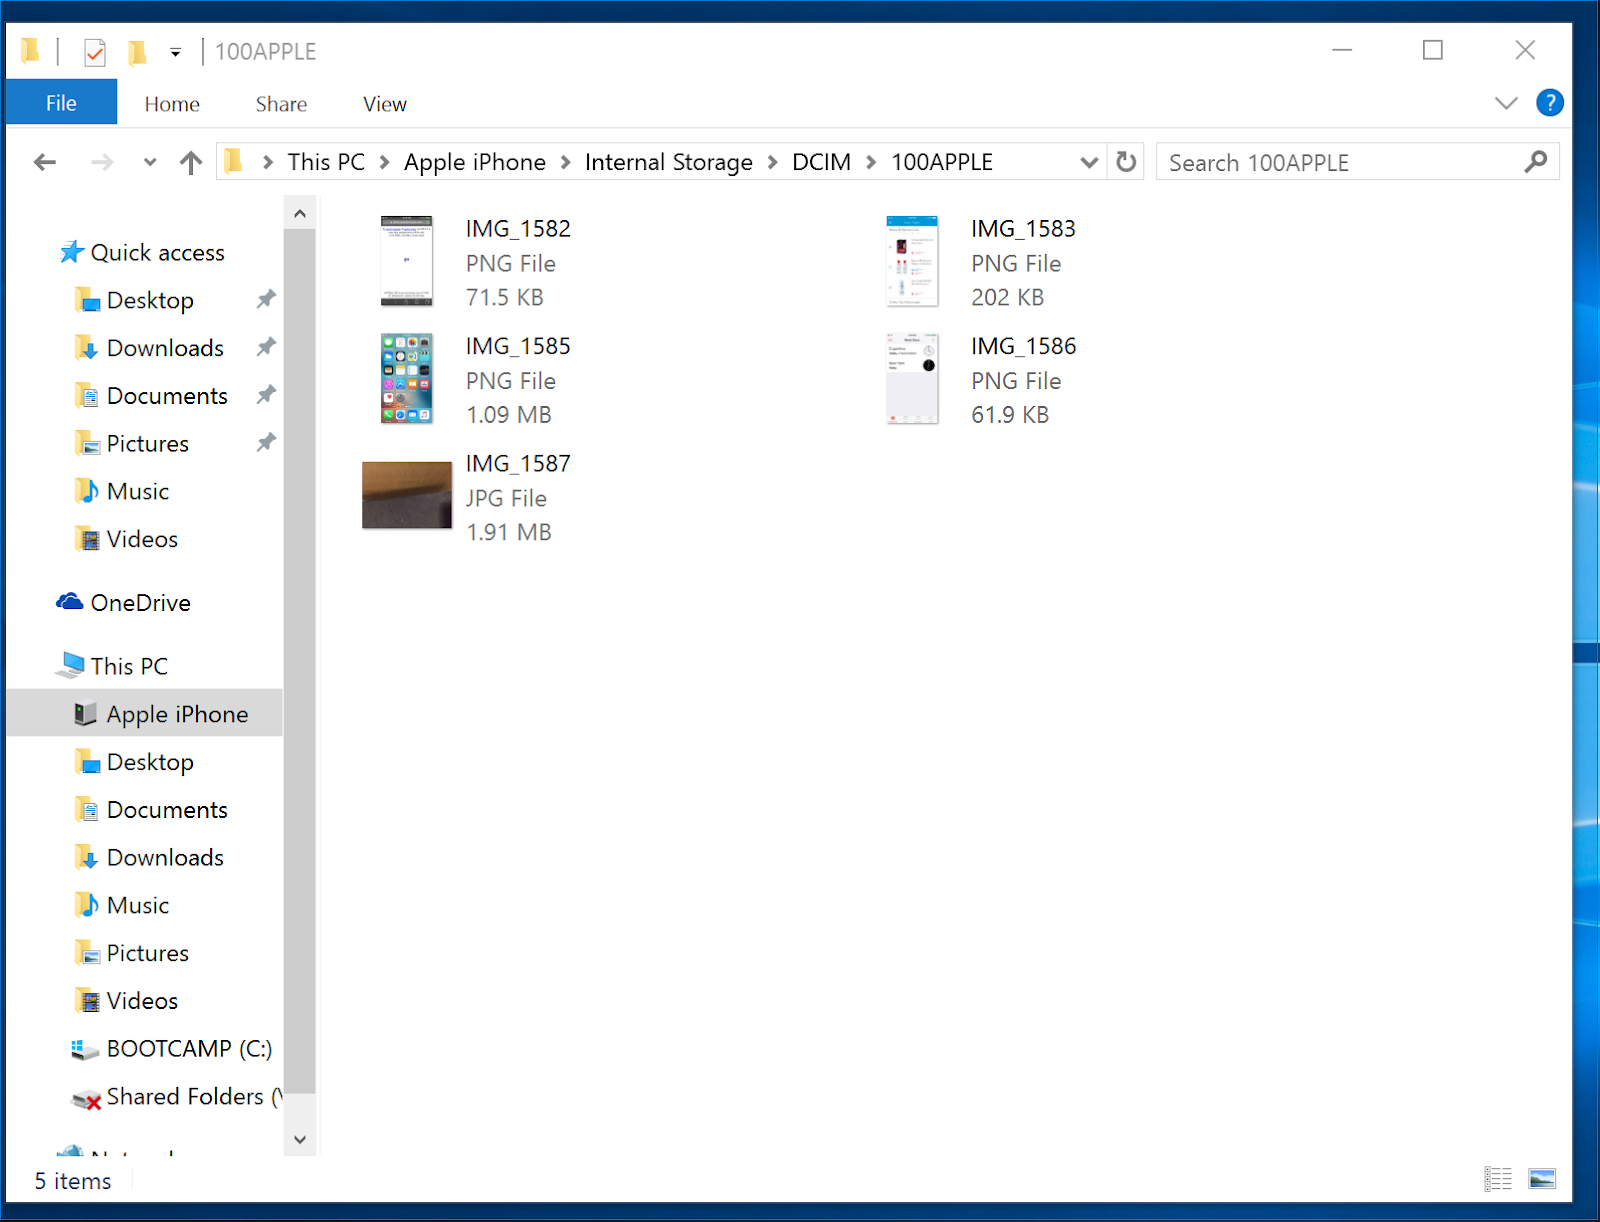
Step 2: Transfer all or selected WhatsApp photos or videos from iPhone to Android

At this step, you have two options and need to choose as you need. First, you can transfer all of your Whatsapp texts and photos from your iPhone to your Android. While the second option allows you to move only selective messages. Let’s see the detailed process of each choice.


Transferring all WhatsApp data from iPhone to Android

For this, you need to check device list, and find and then click on your iPhone. Now go to top toolbar and click “transfer Messages from iPhone to Android.”


Transferring selected conversations from iPhone to Android

First of all, click your iPhone and view the WhatsApp contact names. Now select those contact’s messages which you want to transfer. Now go to top toolbar clicking “transfer Messages from iPhone to Android.”


Confirming your destination Android phone

When you complete the above steps, then “Confirm to transfer to this device?” window will pop up. Here you have to select your Android device name and then finally click on the “confirm” button. All done. Now you are able to check your iPhone installed WhatsApp data on your Android phone.
#2. Send WhatsApp Chats from iPhone to your email to access from Android

This is another method which you can use to transfer your WhatsApp messages on mail. But you can’t restore the WhatsApp messages to your Android from your iOS device. Complete steps are given below.

Step 1: On your iPhone, open WhatsApp and tap “Settings and then tap on Chat Settings.”


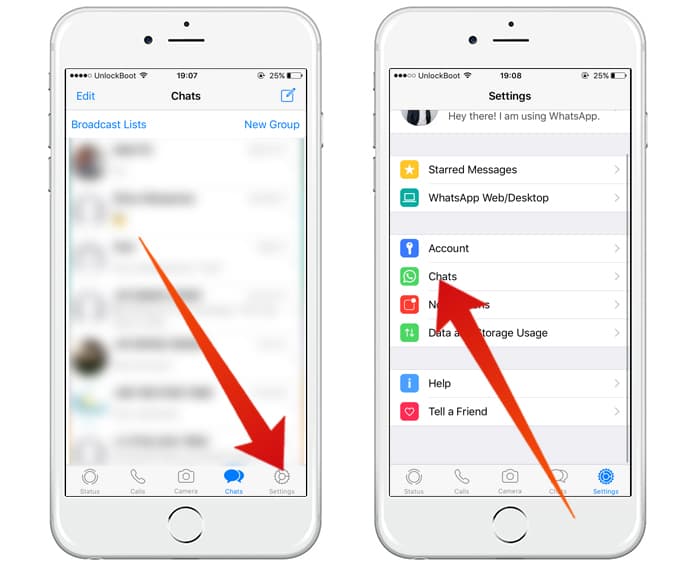
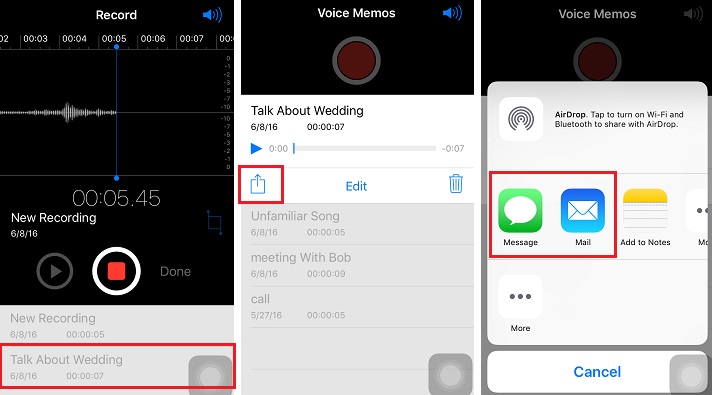
Step 2: Now you can select the specific conversations which you want to transfer. After that tap on it and swipe to the left. Now you will see “More” option. You have to tap on it and then select “Export Chat.” You are also allowed to attach media with email.


Step 3: Now type an e-mail address and press “Send” button.

All done. Now you just have to open that email on your Android phone, and you can access all the transferred messages.
#3. Use WazzapMigrator to Transfer WhatsApp Chats from iPhone to Android

It is the third method which is used to transfer WhatsApp data from iPhone to Android. It is a different method, and you don’t need to transfer your WhatsApp media. Instead, you can backup your WhatsApp media of your iPhone and then can restore on your Android phone.

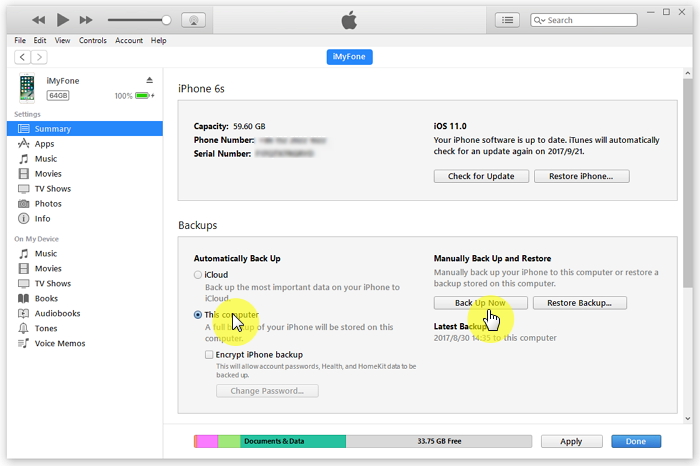
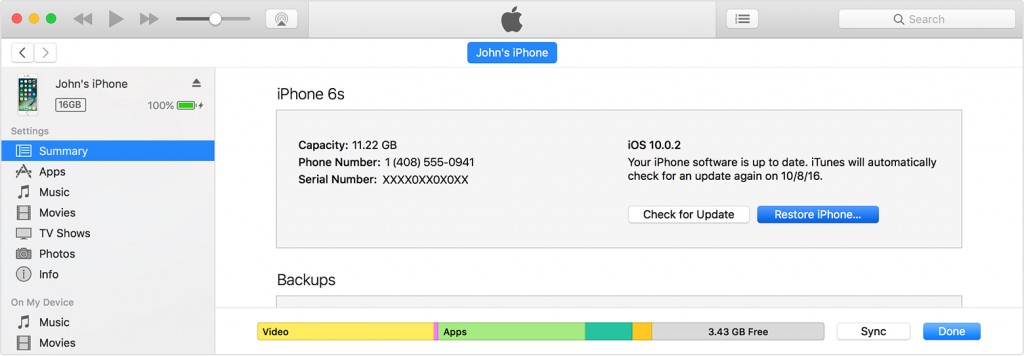
To use this method, you must be sure that you own an unencrypted iTunes backup. Also, you need iTunes backup extractor which will help to find the WhatsApp backup file which is called ChatStorage.sqlite. Follow the following steps.

Step 1: Download and install WazzapMigrator App from Google Play Store on your Android phone.

Step 2: On your computer, transfer ChatStorage.sqlite to your Android phone in the specific WazzapMigrator folder.


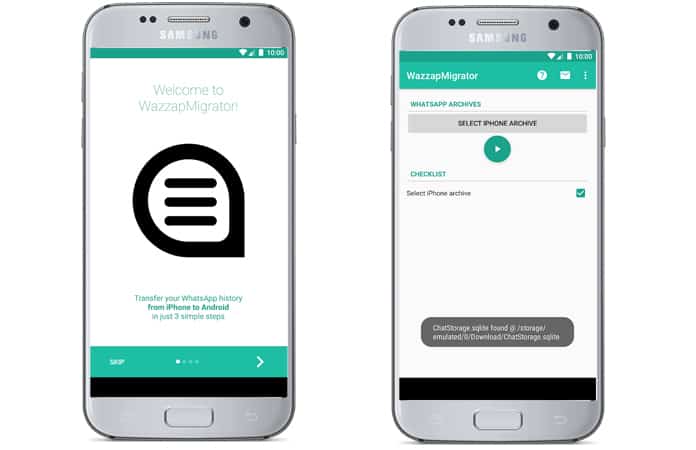
Step 3: Now open WazzapMigrator on Android, and tap “Select iPhone Archive.”

Step 4: Then choose the iOS WhatsApp backup from your phone.

Step 5: Follow the steps on an Android phone with Wazzap Migrator, and you will soon see a window with the message “Conversion Successful.” All done.


Now you can open WhatsApp on your Android phone, and your chat histories will be there.
Summary

These are the best and secure three ways which you can use to transfer WhatsApp Texts and Photos from iPhone to Android. Different ways allow you to do various tasks to get your complete WhatsApp media on your Android. Among all, the use of WazzapMigrator app is quite easy and does not require any long distracting actions to follow. You can easily make complete backups of your WhatsApp messages to access them on Android phones.

If you accidentally lost or deleted any chat message, photo or attachment of WhatsApp on iPhone, you can always easily recover deleted WhatsApp chats with Gihosoft iPhone Data Recovery tool, which is a handy professional tool for iOS users to get back their lost data like Viber chats or iMessages.

Free iTunes/iPhone Backup Extractor for iPhone, iPad

Jihosoft iTunes Backup Extractor is a powerful tool to recover and extract important data from iPhone, iPad & iPod touch backup on Windows or Mac.

Monday, September 3, 2018

How to Reset Disabled iPhone with iTunes


How to Reset Disabled iPhone with iTunes

iTunes is the official Apple mobile device manager, and as such is the prime tool for unlocking a disabled iPhone, iPad and iPod touch. Most often, a disabled iPhone notification would always ask you to connect to iTunes. Here is how to do that:

Step 1. Connect your iPhone to your Mac or PC, and open iTunes.

Step 2. If iTunes request that you trust this computer, use LockWiper to unlock your iPhone. If not, wait for iTunes to back up your iPhone.

Step 3. Click “Restore iPhone”.

Step 4. From the set-up screen, click “Restore from iTunes Backup”, and choose the right backup file from which to restore your iPhone.


Limitations + When to use: You cannot use iTunes to unlock a disabled iPhone if you’ve not used iTunes to sync or back up that device in the time past.

How to Unlock a Disabled iPhone without iTunes >>You may also like:Gihosoft Mobile Transfer: 1 Click Data Transfer from Phone to Phone

Gihosoft Android data recovery Free is a super awesome software specialized in Android file recovery. With this program, you are able to recover deleted photos, music, videos, messages, contacts, call logs, WhatsApp messages, Viber chat history and more from Samsung, Huawei, LG, HTC, Motorola, Google, Oneplus, Sony, Lenovo, ZTE and other Android devices directly. Meanwhile, this Android data recovery software is available for both Windows and Mac platforms.For now, check:Free iTunes/iPhone Backup Extractor for iPhone, iPad

Jihosoft iTunes Backup Extractor free is a powerful tool to recover and extract important data from iPhone, iPad & iPod touch backup on Windows or Mac.

If you can’t sync with iTunes and want to rescue data from a disable iPhone, you could try Gihosoft iPhone Data Recovery. Also feel free to ask questions on the iDevice is disabled error in the comments section below.
iPhone Is Disabled How to Reset via iCloud

iCloud is a good way to regain access to your iPhone again, but the feature “Find My iPhone” must have been enabled before this solution can work.

Step 1. Log on to www.iCloud.com in order to access Find My iPhone feature.

Step 2. Choose “Find iPhone” from the multiple options.

Step 3. Click “All Devices” and select the device you want to unlock.

Step 4. Click “Erase iPhone” and input the necessary credentials.


Limitations + When to use: If you didn’t enable “Find My iPhone” on your device before it was disabled, then the iCloud solution in resetting disabled iPhone is not for you. To erase iPhone remotely, your iPhone should be connected to internet.
How to Reset Disabled iPhone in Recovery Mode

The recovery mode solution is actually for those who didn’t meet the requirements of iTunes. However, this system totally wipes your iPhone data completely.

Step 1. Update your iTunes to the latest version, and close it.

Step 2. Connect your iPhone to your Mac or PC, and launch iTunes.

Step 3. While connecting, force restart your iPhone model with these steps:


On the iPhone X, 8 or 8 Plus: Press and quickly release the Volume Up button. Press and quickly release the Volume Down button. Then, press and hold the Side button until you see “Connect to iTunes”.


On the iPhone 7 or 7 Plus: Press and hold the Volume Down and Side buttons until you see “Connect to iTunes”.


On iPhone 6s and Earlier Versions: Press and hold the Side and Home buttons until you see “Connect to iTunes”.


Step 4. Choose “Restore” for iTunes to wipe your iPhone.


Sunday, September 2, 2018

How to Access iPhone Photos on Mac

How to Access iPhone Photos on Mac - Using Photos App

Or you can use the Mac default apps, Photos app to view your iPhone photos.


Connect iPhone to Mac with Apple USB cable.


The Photos app will pop up automatically. If not, go to “Finder > Applications” and launch it manually.


All your photos will be shown there according to the added date.


If you want to import the photos to your Mac, just click the Import tab, select the photos and click on Import XX Selected or Import All Items button.

Disadvantages:


You can’t access or transfer the photos according to albums.


It does load the photos in Photo stream and the videos in camera roll.
3 How to View iPhone Photos on PC - Windows Explorer

Or you can access your iPhone photos on PC via Windows explorer. It won’t require any other software installed. But it’s not recommended because all your photos are divided into lots of folders, which makes it hard for you to find the one you need.


Connect your iPhone to PC. Trust this PC on your iPhone if required.


On your PC, go to “My Computer/This PC” and you will find your iPhone name under “Devices and drives”. Double click on it.


All your photos are stored in different folders according to added time. You should open each folder to access the photos in it.


If you want to copy them to your computer, just copy and paste them.


Disadvantages:


All your photos are not in the same place. You need to open each folder to detect the photos.


You can’t access or view your iPhone photos according to albums.


You can’t access the .heic format iPhone photos on PC.


You can’t access the photos in Photo Stream.
Accessing your Camera Roll on Windows

Windows users will find it’s easy to view their iOS device’s Camera Roll on the computer too, and it can be done by following these steps:

1) Connect your iPhone or iPad to your PC with the supplied Lightning cable.

2) If prompted to trust the computer you’re connecting to, tap on the Trust button.

3) Open a Windows Explorer window.

4) Click on the Apple iPhone or Apple iPad option from the sidebar.


5) Double-click on the Internal Storage folder.


6) Double-click on the DCIM folder.


7) Double-click on the 100Apple folder.


8) You can now view the contents of your iOS device’s Camera Roll:


From this window, you can easily drag contents out of your device’s Camera Roll and onto your computer. You can also delete items that you no longer want on your iPhone. Unfortunately, this method doesn’t allow you to add images to your Camera Roll.You may also like:Gihosoft Mobile Transfer: 1 Click Data Transfer from Phone to Phone

Gihosoft Android data recovery Free is a super awesome software specialized in Android file recovery. With this program, you are able to recover deleted photos, music, videos, messages, contacts, call logs, WhatsApp messages, Viber chat history and more from Samsung, Huawei, LG, HTC, Motorola, Google, Oneplus, Sony, Lenovo, ZTE and other Android devices directly. Meanwhile, this Android data recovery software is available for both Windows and Mac platforms.For now, check:Free iTunes/iPhone Backup Extractor for iPhone, iPad

Jihosoft iTunes Backup Extractor free is a powerful tool to recover and extract important data from iPhone, iPad & iPod touch backup on Windows or Mac.

If you can’t sync with iTunes and want to rescue data from a disable iPhone, you could try Gihosoft iPhone Data Recovery. Also feel free to ask questions on the iDevice is disabled error in the comments section below.


macOS Catalina Is Causing Issues with Select eGPUs

macOS Catalina is apparently breaking many apps. Users have reported that they are facing problems after updating to macOS Catalina with...